Road Test Tips: How to Pass Your G2 on the First Try
Passing your G2 on the first try is not about being a perfect driver. It is about showing the examiner, consistently, that you notice what is happening around you and make safe decisions because of it.
Most people who fail do not make one dramatic mistake. They lose marks slowly through small habits: a rolling stop here, a missed shoulder check there, a signal that came a little too late. The Road Test tips below are about fixing those habits before test day.
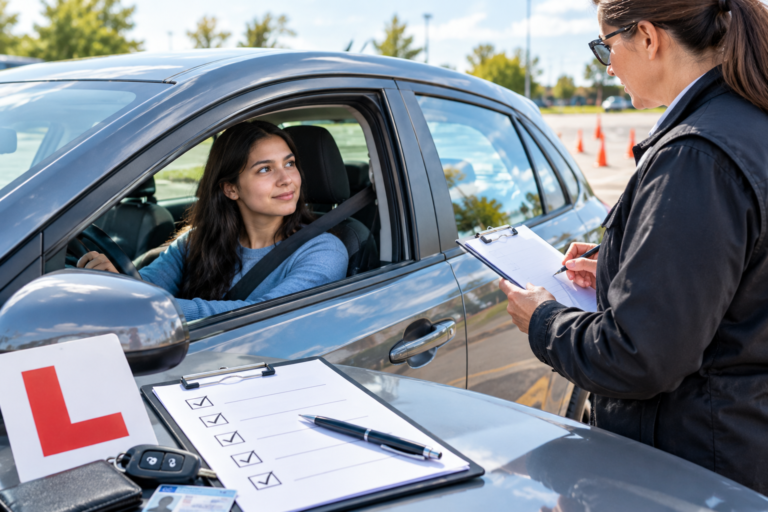
This post is about how to drive the test. For what to bring and the vehicle rules, see our G2 road test checklist. For what the test covers, start with the G2 road test guide.
What Is the Examiner Actually Looking For?
During the drive, the examiner scores your skills against set criteria on a scoresheet. In plain terms, they are watching four things:
- Observation — do you look before you act, every time?
- Vehicle control — are your steering, braking and speed smooth and deliberate?
- Judgment — do you pick safe gaps, safe speeds and the right lane?
- Rules — do you obey signs, signals and right-of-way without being reminded?
One thing worth knowing before you start: the examiner is not allowed to coach you. If you have a question, ask it before the test begins, not while you are driving.
What Should You Practise Before Your Test?
DriveTest recommends practising these skills in a variety of locations, times of day (as your licence allows) and driving conditions:
- Starting, stopping and turning
- Traffic signs and lights
- Passing vehicles, including bicycles, and driving in passing lanes
- Travelling through controlled and uncontrolled intersections
- Parking, reversing and three-point turns
- Spotting hazardous conditions early and being ready for them
The words “a variety of locations and conditions” matter. Practising the same quiet loop twenty times builds comfort, not skill. Rain, dusk, heavy traffic and unfamiliar streets are where the real practice happens.
Tip 1: Make Your Observation Obvious
This is the single biggest difference between drivers who pass and drivers who do not. The examiner cannot read your mind — they can only see where your head goes.
- Check your mirrors every five seconds or so, as the handbook recommends, not only when you are about to do something.
- Check your blind spot by turning your head to look over your shoulder. Mirrors alone are not enough.
- Move your head, not just your eyes. A quick, deliberate shoulder check is visible. A glance is not.
- Scan intersections before you enter, including sidewalks and paths, not just the road.
The habit to build is mirror, signal, shoulder check, then move. In that order, every single time.
Tip 2: Stop Properly, Every Time
Rolling stops are one of the easiest ways to lose marks, and one of the easiest habits to fix.
At a stop sign or red light, come to a complete stop:
- At the stop line, if one is marked on the pavement
- If there is no stop line, at the crosswalk, marked or not
- If there is no crosswalk, at the edge of the sidewalk
- If there is no sidewalk, at the edge of the intersection
Then wait until the way is clear before entering the intersection. A useful practice habit: come to a stop and count “one thousand and one” before you move. It feels slow at first, and it looks exactly like a proper stop from the passenger seat.
Tip 3: Signal Early, and Cancel It
The handbook is specific about this: give the correct signal well before you act, and make sure other drivers can see it. Signal before stopping, slowing down, turning, changing lanes, leaving the road or pulling out from a parked position.
Two things people forget:
- Signalling does not give you the right-of-way. You still have to check that the way is clear. Signal, then look, then move.
- Cancel the signal after the move. A signal left blinking tells everyone behind you something that is not true.
Tip 4: Keep a Real Following Distance
In good conditions, stay at least two seconds behind the vehicle ahead. Here is how to measure it:
- Pick a fixed marker ahead — a sign or a pole.
- When the vehicle ahead passes it, count “one thousand and one, one thousand and two”.
- If you reach the marker before you finish counting, you are too close.
Two seconds is a minimum for ideal conditions. Leave more in bad weather, behind motorcycles or large trucks, or when you are carrying a heavy load.
Tip 5: Get Your Speed Right in Both Directions
Speeding is an obvious problem. Driving far too slowly is also a problem, because it can block traffic and it reads as hesitation.
Obey the posted limit, but always drive at a speed that lets you stop safely. That means going below the limit in bad weather, heavy traffic or construction zones. Where no limit is posted, the maximum is 50 km/h in cities, towns and villages, and 80 km/h elsewhere.
Watch for school zones and construction zones, where limits are lower to protect children and workers.
Tip 6: Handle Intersections With a Plan
Intersections are where most of the test’s decisions happen. Know the rules cold so you are not calculating under pressure:
| Situation | What to do |
| Green light | Go through at a steady speed, after yielding to anyone already in the intersection |
| Turning left or right | Yield to pedestrians in or approaching your path; when turning left, wait for oncoming traffic |
| Four-way stop, arriving together | The vehicle on the left yields to the vehicle on the right |
| No signs or lights, arriving together | The driver on the left lets the driver on the right go first |
| Blocked intersection ahead | Stop before entering and wait — unless you are turning |
| Turning left across a bike lane | Stop and wait for oncoming cyclists to pass |
One more habit worth building: before turning left, check your blind spot for cyclists coming up behind you, especially where there is a bike lane on your right.
Tip 7: Take Your Time With Parking and Manoeuvres
Parallel parking and three-point turns make people rush. Rushing is what costs marks — not taking an extra few seconds.
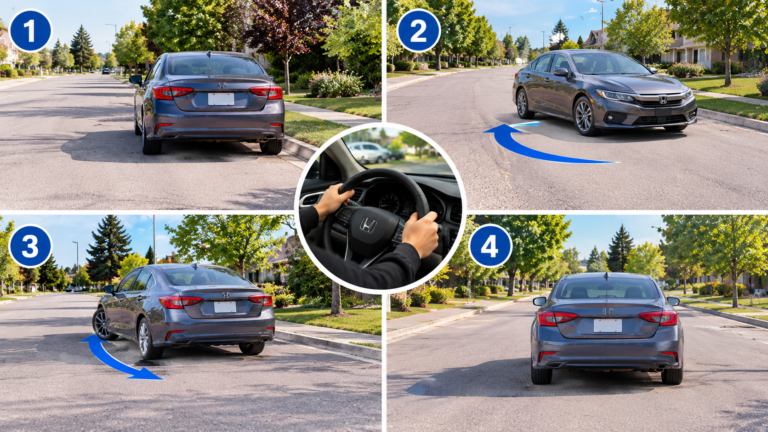
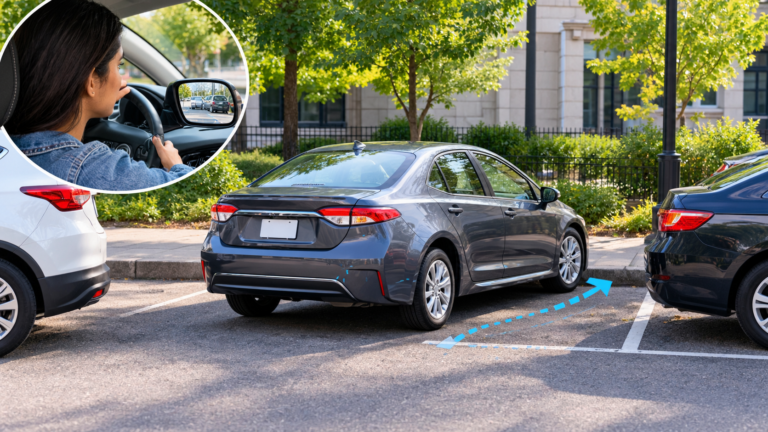
Parallel parking
Find a space about one and a half times longer than your vehicle. Signal, pull alongside the car ahead of the space leaving about a metre between you, and stop when your rear bumper lines up with theirs. Then:
- Reverse slowly, turning the wheel fully toward the curb.
- When you can see the outside rear corner of the car in front of the space, straighten your wheels and keep reversing.
- Turn the wheel fully toward the road to bring your car in line with the curb.
- If you are not parallel, drive forward to straighten up.
You are allowed to adjust. A calm correction looks far better than a crooked park you leave alone.
Roadside stop
Check your mirrors and blind spot, signal, then steer smoothly to the side and stop parallel to the curb, no more than about 30 centimetres from it. Turn off your signal and put on your hazard lights. Do not stop where you would block an entrance or traffic.
Pulling back out
Release the parking brake, turn off the hazards and signal left. Just before you pull away, check your mirrors and your blind spot for vehicles and cyclists. Accelerate smoothly to blend with traffic, then cancel your signal.
Tip 8: Sit Properly and Steer Smoothly
Small mechanics make everything else easier. The handbook suggests picturing the wheel as a clock and placing your hands at nine o’clock and three o’clock. Use your right foot for both pedals, so you never press both at once or flash your brake lights for no reason.
Steering should be smooth and precise, and you should be able to hold a straight line while checking a blind spot or adjusting a control.
Tip 9: Book a Mock Road Test
Practising with a parent or friend builds comfort, but they are not scoring you. A mock road test with an instructor does two things no amount of solo practice can:
- It shows you the habits you cannot see in yourself — the rolling stop you have done for months, the shoulder check you only think you are doing.
- It makes the real test feel familiar, which takes the edge off the nerves.
If you only do one thing on this list, do this one. It turns vague worry into a short list of specific fixes.
Tip 10: Manage Test-Day Nerves
Nerves are normal. They only become a problem when they push you into rushing.
- Arrive early. DriveTest asks for at least 30 minutes; the extra time stops you starting the test already flustered.
- Ask your questions before you start. The examiner will explain the test and cannot coach you afterwards.
- Talk yourself through it in practice, saying “mirror, signal, shoulder check” out loud. It builds the habit and gives your brain something steady to hold onto on test day.
- Treat a mistake as one moment, not the whole test. Drivers who dwell on a small error often make a bigger one at the next intersection.
- Drive the way you practised. Do not invent a new, extra-cautious style on test day.
What Mistakes Cost People the Most Marks?
These are the habits instructors see most often. None of them are hard to fix once you know they are there.
| Mistake | The fix |
| Rolling through stop signs | Full stop at the line, count one second, then go |
| Mirror-only lane changes | Turn your head and check the blind spot every time |
| Late signals | Signal well before the action, and cancel it after |
| Following too closely | Use the two-second count, more in bad weather |
| Driving far below the limit | Keep pace with traffic within the posted limit |
| Drifting in the lane | Stay centred; finish turns in the correct lane |
| Rushing the parking manoeuvres | Slow down; adjust if you need to |
| Dwelling on a mistake | Reset at the next intersection and keep driving |
Does the G2 Test Include Highway Driving?
No. Highway driving is the focus of the G road test, which you can take after at least 12 months with your G2. The G2 is a city test on regular streets. That said, highway practice before your G2 is still worthwhile and with a G1 you can drive on any road when you are with an Ontario-certified driver instructor.
Coclusion
Reading tips is easy; building habits takes practice with someone who can see what you cannot. Go Drive Driving School G2 driving lessons in Barrie focus on exactly these skills observation, stops, intersections, parking — with honest feedback after every drive, plus mock road tests so test day feels familiar. See our programs and fees or contact us at 705-717-0406.
FAQs
What is the best way to pass the G2 on the first try?
Practise in varied conditions, make your observation visible, come to complete stops, and book a mock test with an instructor to catch the habits you cannot see in yourself.
Can the examiner tell me what I did wrong during the test?
Not during the drive — examiners are not allowed to coach. You get a short verbal summary after the test, and your scoresheet shows where to improve.
How many mistakes can I make and still pass?
There is no public pass-mark you can plan around, and any claimed number you see online is not official. The examiner scores you against set criteria, so aim for consistent safe driving rather than counting errors.
Should I drive slower than the speed limit to be safe?
No. Drive at a speed that lets you stop safely, which usually means keeping pace with traffic within the posted limit. Driving far too slowly can block traffic and reads as hesitation.
What should I do if I make a mistake during the test?
Keep driving safely. One error does not end the test, but reacting badly to it often leads to a second one.
How much practice do I need before booking?
It varies by person. A good signal is that the tested skills feel automatic rather than effortful. Our post on how many driving lessons you need for G2 can help you plan.
Is parallel parking on the G2 test?
Yes. It is one of the skills the Ontario government lists for the G2 road test.